In this tutorial, you’ll learn how to localize and internationalize your Flutter app, the difference between localization and internationalization, and step-by-step instructions to do both,
But, first, let the numbers do the talking! So, pay attention, Flutter developers; opportunities are budding for you!
- Distimo: 90% of the top apps are delivered in English, but localization is increasingly important. Also, localized apps are downloaded almost 128% as often and earn nearly 26% more revenue per supported country.
- 8 out of 10 top countries for app downloads are not English-speaking. - Sensor Tower
Difference Between Internationalization and Localization
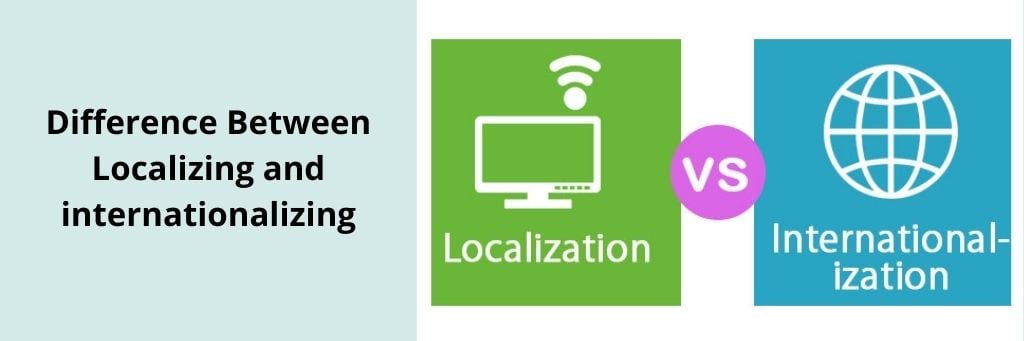
Many people mistakenly used both terms interchangeably. But, where do you draw the line, since these terms are critical in the Flutter app development process nowadays?
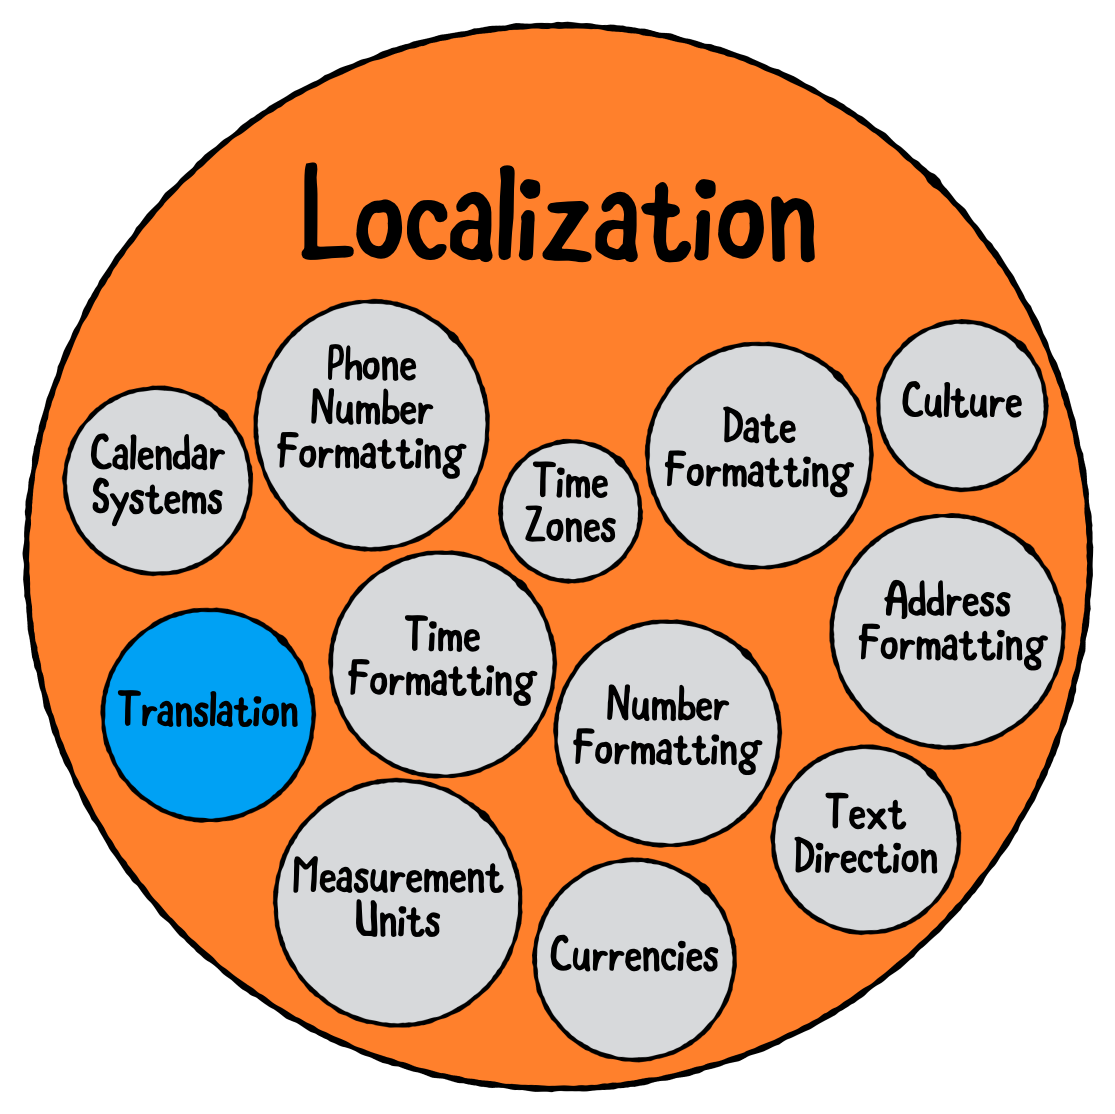
Localization- The process of making your app available to the locales is called localization. In localization, we define the language of the users, region, and any specific variant.
But how do we do it? Do we just need to add ‘if’ statements everywhere and decide which text to display where? NO! Neither do we need to create a copy of every language code or add ‘if statements.’ We simply need to rely on internationalization here.
Internationalization- It is the process of engineering your code to simplify the localization. Also, it has the capacity to support more than one locale without needing to have done substantial engineering efforts. Internalization is essential even if it is not in your plan, as that will make your code much cleaner and future-proof.
Using Flutter to Internationalize Your Apps

You will need to use Flutter Packages that enable i18n.
Step #1: Flutter localizations package
Flutter_localizations package is incorporated with Flutter, containing different localization points for Flutter widgets. You can even see the Flutter Documentation to see what localization settings the package offers.
Intl library is the most prominent library for Flutter i18n, which is the official Dart package.
Intl Class has a default locale and multiple methods, which allows you to access i18n mechanisms.
DateFormat, NumerFormat, BidiFormatter classes, genres, message translations are available in the i18n and I10n facilities.
Set the App Design
For the pages that we are going to edit, we need to set the design for the Flutter application.
The Flutter app we are preparing will incorporate the following pages, which can be easily navigated while using the app.
- Home Page
- About us Page
- Settings Page
Step #2:Creating Routes
Now, we need to configure routers in the Flutter app to make configuration possible. For this, we need to take the ‘main.dart’ file and remove everything from the code to achieve the stateless widget. You can see various routing options, including IntialRoute, onGenerateRoute, and onGenerateInitialRoute in the MaterialApp class. Out of this, we will be using the first and the second one.
Now, you will have to put the code lines mentioned below in the MaterialApp.
onGenerateRoute: CustomRouter.allRoutes,
initialRoute: homeRoute,
CustomRouter is a custom class with a ‘allroutes’ method inside it. Also, ‘InitialRoute’ will accept the string value inside it. This is the first route that will be displayed when navigators are created.
Create CustomRouter class, a subdirectory called ‘routes’ inside the ‘lib’ directory. You will have to create a new file called ‘custom_router.dart’ in the routes directory. Then, you will have to use the code written below in it.
import 'package:flutter/material.dart';
import 'package:flutter_localization/pages/about_page.dart';
import 'package:flutter_localization/pages/home_page.dart';
import 'package:flutter_localization/pages/not_found_page.dart';
import 'package:flutter_localization/pages/settings_page.dart';
import 'package:flutter_localization/router/route_constants.dart';
class CustomRouter {
static Route<dynamic> generatedRoute(RouteSettings settings) {
switch (settings.name) {
case homeRoute:
return MaterialPageRoute(builder: (_) => HomePage());
case aboutRoute:
return MaterialPageRoute(builder: (_) => AboutPage());
case settingsRoute:
return MaterialPageRoute(builder: (_) => SettingsPage());
default:
return MaterialPageRoute(builder: (_) => NotFoundPage());
}
}
}
After using this code, you have created the static method, ‘generatedRoute’ inside the ‘CustomRouter’ class. It will return the Route <dynamic>. Now, the RouteSettings are in place. Now, if the user navigates from one page to another, it will pass the router settings to us. We can easily manipulate the settings to understand the intended navigation page of the user.
switch(settings.name) can be used to see the case statements to decide where to navigate based on the choice made by the user.
Now, you will be creating another file called ‘route_names.dart’ in the same directory. In this directory, you will be able to find all the route names constants that we will be using for the pages in the Flutter app.
const String homeRoute = "home";
const String aboutRoute = "about";
const String settingsRoute = "settings";
Step #3:Creating Pages
Once we have created the routes, we will now move forward to making the pages. For that, we will now create another subdirectory for ‘pages’ inside the ‘lib’ folder. You will have to create the files in this subdirectory, which are mentioned below:
- Home_page.dart
- About_page.dart
- Settings_page.dart
- not_found_page.dart
After creating this, you will have to include the code that is given below in the home_page.dart
import 'package:flutter/material.dart';
import 'package:flutter_localization/classes/language.dart';
import 'package:flutter_localizationlocalization/language_constants.dart';
import 'package:flutter_localization/main.dart';
import 'package:flutter_localization/router/route_constants.dart';
class HomePage extends StatefulWidget {
HomePage({Key key}) : super(key: key);
@override
_HomePageState createState() => _HomePageState();
}
class _HomePageState extends State<HomePage> {
final GlobalKey<FormState> _key = GlobalKey<FormState>();
void _changeLanguage(Language language) async {
Locale _locale = await setLocale(language.languageCode);
MyApp.setLocale(context, _locale);
}
void _showSuccessDialog() {
showTimePicker(context: context, initialTime: TimeOfDay.now());
}
@override
Widget build(BuildContext context) {
return Scaffold(
appBar: AppBar(
),
drawer: Drawer(
child: _drawerList(),
),
body: Container(
padding: EdgeInsets.all(20),
child: _mainForm(context),
),
);
}
Once you have added this code, it is time to now create the main form of our application, which is as follows:
Form _mainForm(BuildContext context) {
return Form(
key: _key,
child: Column(
children: <Widget>[
Container(
height: MediaQuery.of(context).size.height / 4,
child: Center(
child: Text(S.of(context).homePageMainFormTitle,
textAlign: TextAlign.center,
style: TextStyle(
fontSize: 30,
fontWeight: FontWeight.bold,
),
),
),
),
TextFormField(
validator: (val) {
if (val.isEmpty) {
return S.of(context).formFieldRequired;
}
return null;
},
decoration: InputDecoration(
border: OutlineInputBorder(),
labelText: S.of(context).formFieldName,
hintText: S.of(context).formFieldNameHint,
),
),
SizedBox(
height: 10,
),
TextFormField(
validator: (val) {
if (val.isEmpty) {
return S.of(context).formFieldRequired;
}
return null;
},
decoration: InputDecoration(
border: OutlineInputBorder(),
labelText: S.of(context).formFieldEmail,
hintText: S.of(context).formFieldEmailHint,
),
),
SizedBox(
height: 10,
),
TextFormField(
decoration: InputDecoration(
border: OutlineInputBorder(),
hintText: S.of(context).formFieldDOB),
onTap: () async {
FocusScope.of(context).requestFocus(FocusNode());
await showDatePicker(
context: context,
initialDate: DateTime.now(),
firstDate: DateTime(DateTime.now().year),
lastDate: DateTime(DateTime.now().year + 20),
);
},
),
SizedBox(
height: 10,
),
MaterialButton(
onPressed: () {
if (_key.currentState.validate()) {
_showSuccessDialog();
}
},
height: 50,
shape: StadiumBorder(),
color: Theme.of(context).primaryColor,
child: Center(
child: Text(
S.of(context).formFieldSubmitInfo,
style: TextStyle(color: Colors.white, fontSize: 20),
),
),
)
],
),
);
}
After this, we will include the navigation for the ‘Settings Page’ and the ‘About Us Page.’ let’s do it now.
Container _drawerList() {
TextStyle _textStyle = TextStyle(
color: Colors.white,
fontSize: 24,
);
return Container(
color: Theme.of(context).primaryColor,
child: ListView(
padding: EdgeInsets.zero,
children: <Widget>[
DrawerHeader(
child: Container(
height: 100,
child: CircleAvatar(),
),
),
ListTile(
leading: Icon(
Icons.info,
color: Colors.white,
size: 30,
),
title: Text(
'about_us',
style: _textStyle,
),
onTap: () {
// To close the Drawer
Navigator.pop(context);
// Navigating to About Page
Navigator.pushNamed(context, aboutRoute);
},
),
ListTile(
leading: Icon(
Icons.settings,
color: Colors.white,
size: 30,
),
title: Text(
'settings',
style: _textStyle,
),
onTap: () {
// To close the Drawer
Navigator.pop(context);
// Navigating to About Page
Navigator.pushNamed(context, settingsRoute);
},
),
],
),
);
}
}
Step #4: To Switch Between the Locales using the Dropdown Menu
The next step is to switch between locales with the dropdown menu. Then, go to the built widget of the homepage, and add the code given below the ‘AppBar.’
appBar: AppBar(
title: Text( 'home page'),
actions: <Widget>[
Padding(
padding: const EdgeInsets.all(8.0),
child: DropdownButton<Language>(
underline: SizedBox(),
icon: Icon(
Icons.language,
color: Colors.white,
),
onChanged: (Language language) {
_changeLanguage(language);
},
items: Language.languageList()
.map<DropdownMenuItem<Language>>(
(e) => DropdownMenuItem<Language>(
value: e,
child: Row(
mainAxisAlignment: MainAxisAlignment.spaceAround,
children: <Widget>[
Text(
e.flag,
style: TextStyle(fontSize: 30),
),
Text(e.name)
],
),
),
)
.toList(),
),
),
],
)
After that, create a separate file that will be handling all the languages. Create a subdirectory in ‘lib’ directory and name it ‘classes’ to create a ‘language.dart’ file with the code given below:
class Language {
final int id;
final String flag;
final String name;
final String languageCode;
Language(this.id, this.flag, this.name, this.languageCode);
static List<Language> languageList() {
return <Language>[
Language(1, "??", "French", "fr"),
Language(2, "??", "English", "en"),
Language(3, "??", "اَلْعَرَبِيَّةُ", "ar"),
];
}
}
Since everything is needed to be set up in the app, we now need to integrate it with internationalization.
Step #5: Using the Flutter Localizations Package
Add it to the pubspec.yaml as a dependency and use the code given below:
dependencies:
flutter:
sdk: flutter
flutter_localizations:
sdk: flutter
Now, use it in the main.dart file using this code:
import 'package:flutter_localizations/flutter_localizations.dart';
Now, specify localizationsDelegates and supportedLocales for MaterialApp
supportedLocales: [
Locale("en", "US"),
Locale("fr", "FR"),
Locale("ar", "SA"),
],
localizationsDelegates: [
DemoLocalization.delegate,
GlobalMaterialLocalizations.delegate,
GlobalWidgetsLocalizations.delegate,
GlobalCupertinoLocalizations.delegate,
],
localizationsDelegates elements are factories that offer a collection of localized values.
localeResolutionCallback will be used for creating a callback resolution, mainly responsible for computing locale of app’s localization when the default locale is changed by the user.
localeResolutionCallback: (locale, supportedLocales) {
for (var supportedLocale in supportedLocales) {
if (supportedLocale.languageCode == locale.languageCode &&
supportedLocale.countryCode == locale.countryCode) {
return supportedLocale;
}
}
return supportedLocales.first;
}
Step #6: Working on to Make it Stateful
Select a language from the dropdown and see what changes. Since ‘MyApp’ class is still a StatelessWidget, it won’t work as needed. To make it work, we will not modify StatelessWidget by placing the cursor on StatelessWidget and hitting Alt+Enter. Now, click on ‘Convert to StatefulWidget’ to modify it and make it work for us.
class MyApp extends StatefulWidget {
const MyApp({Key key}) : super(key: key);
static void setLocale(BuildContext context, Locale newLocale) {
_MyAppState state = context.findAncestorStateOfType<_MyAppState>();
state.setLocale(newLocale);
}
@override
_MyAppState createState() => _MyAppState();
}
class _MyAppState extends State<MyApp> {
Locale _locale;
setLocale(Locale locale) {
setState(() {
_locale = locale;
});
}
//rest of the code
Now, we will create some constants in another file, language_constants.dart in the localization directory.
import 'package:flutter/material.dart';
import 'package:shared_preferences/shared_preferences.dart';
const String LAGUAGE_CODE = 'languageCode';
//languages code
const String ENGLISH = 'en';
const String FRENCH = 'fr';
const String ARABIC = 'ar';
const String HINDI = 'hi';
Future<Locale> setLocale(String languageCode) async {
SharedPreferences _prefs = await SharedPreferences.getInstance();
await _prefs.setString(LAGUAGE_CODE, languageCode);
return _locale(languageCode);
}
Future<Locale> getLocale() async {
SharedPreferences _prefs = await SharedPreferences.getInstance();
String languageCode = _prefs.getString(LAGUAGE_CODE) ?? "en";
return _locale(languageCode);
}
Locale _locale(String languageCode) {
switch (languageCode) {
case ENGLISH:
return Locale(ENGLISH, 'US');
case FRENCH:
return Locale(FRENCH, "FR");
case ARABIC:
return Locale(ARABIC, "SA");
default:
return Locale(ENGLISH, 'US');
}
}
Now, the app is depending on a source file, intl/110n.dart and every string in the app will be defined by it that is localized. For this, we will need to follow these two processes:
import 'package:flutter/material.dart';
import 'package:intl/intl.dart';
import 'intl/messages_all.dart';
class S {
S();
static S current;
static const AppLocalizationDelegate delegate =
AppLocalizationDelegate();
static Future<S> load(Locale locale) {
final name = (locale.countryCode?.isEmpty ?? false) ? locale.languageCode : locale.toString();
final localeName = Intl.canonicalizedLocale(name);
return initializeMessages(localeName).then((_) {
Intl.defaultLocale = localeName;
S.current = S();
return S.current;
});
}
static S of(BuildContext context) {
return Localizations.of<S>(context, S);
}
/// `Home Page`
String get homePageAppBarTitle {
return Intl.message(
'Home Page',
name: 'homePageAppBarTitle',
desc: '',
args: [],
);
}
/// `Personal Information`
String get homePageMainFormTitle {
return Intl.message(
'Personal Information',
name: 'homePageMainFormTitle',
desc: '',
args: [],
);
}
/// `Name`
String get formFieldName {
return Intl.message(
'Name',
name: 'formFieldName',
desc: '',
args: [],
);
}
/// `Enter your name`
String get formFieldNameHint {
return Intl.message(
'Enter your name',
name: 'formFieldNameHint',
desc: '',
args: [],
);
}
/// `Email`
String get formFieldEmail {
return Intl.message(
'Email',
name: 'formFieldEmail',
desc: '',
args: [],
);
}
/// `Enter your email`
String get formFieldEmailHint {
return Intl.message(
'Enter your email',
name: 'formFieldEmailHint',
desc: '',
args: [],
);
}
/// `Date of Birth`
String get formFieldDOB {
return Intl.message(
'Date of Birth',
name: 'formFieldDOB',
desc: '',
args: [],
);
}
/// `Required Field`
String get formFieldRequired {
return Intl.message(
'Required Field',
name: 'formFieldRequired',
desc: '',
args: [],
);
}
/// `Submit Info`
String get formFieldSubmitInfo {
return Intl.message(
'Submit Info',
name: 'formFieldSubmitInfo',
desc: '',
args: [],
);
}
/// `About Us`
String get aboutUsPageAppBarTitle {
return Intl.message(
'About Us',
name: 'aboutUsPageAppBarTitle',
desc: '',
args: [],
);
}
/// `Settings`
String get settingsPageAppBarTitle {
return Intl.message(
'Settings',
name: 'settingsPageAppBarTitle',
desc: '',
args: [],
);
}
/// `Change Language`
String get formFieldChangeLanguage {
return Intl.message(
'Change Language',
name: 'formFieldChangeLanguage',
desc: '',
args: [],
);
}
/// `Lorem Ipsum is simply dummy text of the printing and typesetting industry. Lorem Ipsum has been the industry's standard dummy text ever since the 1500s.`
String get formFieldAbout {
return Intl.message(
'Lorem Ipsum is simply dummy text of the printing and typesetting industry. Lorem Ipsum has been the industry\'s standard dummy text ever since the 1500s.',
name: 'formFieldAbout',
desc: '',
args: [],
);
}
}
class AppLocalizationDelegate extends LocalizationsDelegate<S> {
const AppLocalizationDelegate();
List<Locale> get supportedLocales {
return const <Locale>[
Locale.fromSubtags(languageCode: 'en', countryCode: 'US'),
Locale.fromSubtags(languageCode: 'ar', countryCode: 'SA'),
Locale.fromSubtags(languageCode: 'fr', countryCode: 'FR'),
];
}
@override
bool isSupported(Locale locale) => _isSupported(locale);
@override
Future<S> load(Locale locale) => S.load(locale);
@override
bool shouldReload(AppLocalizationDelegate old) => false;
bool _isSupported(Locale locale) {
if (locale != null) {
for (var supportedLocale in supportedLocales) {
if (supportedLocale.languageCode == locale.languageCode) {
return true;
}
}
}
return false;
}
}

Step #7: Extracting to Application Resource Bundle (ARB) File
Create intl/110n.arb from lib/main.dart by using the command given below:
flutter pub run intl_translation:extract_to_arb --output-dir=lib/intl lib/main.dart
This command will create a file intl_messages.arb that will contain all messages from the program. Here, we have one entry for every Intl.message() function defined in the main.dart file. It will act as input for Google Translator Toolkit.
After that, it is time to generate intl_messages_<locate>.dart for every intl_<locale>.arb and all the messages will be imported in intl_message_all.dart file.
flutter pub run intl_translation:generate_from_arb \
--output-dir=lib/l10n --no-use-deferred-loading \
lib/main.dart lib/l10n/intl_*.arb
For Windows, your command will change, as it doesn’t support wildcarding. So, the code will be:
flutter pub run intl_translation:generate_from_arb \
--output-dir=lib/l10n --no-use-deferred-loading \
lib/main.dart \
lib/l10n/intl_en_US.arb lib/l10n/intl_fr_FR.arb lib/l10n/intl_messages.arb
Once that is done, we will now create the translation files.
intl_en_US.arb
{
"@@locale": "en_US",
"homePageAppBarTitle": "Home Page",
"homePageMainFormTitle": "Personal Information",
"formFieldName": "Name",
"formFieldNameHint": "Enter your name",
"formFieldEmail": "Email",
"formFieldEmailHint": "Enter your email",
"formFieldDOB": "Date of Birth",
"formFieldRequired": "Required Field",
"formFieldSubmitInfo": "Submit Info",
"aboutUsPageAppBarTitle": "About Us",
"settingsPageAppBarTitle": "Settings",
"formFieldChangeLanguage": "Change Language",
"formFieldAbout": "Lorem Ipsum is simply a dummy text of the printing and typesetting industry. Lorem Ipsum has been the industry's standard dummy text ever since the 1500s."
}
intl_ar_SA.arb
{
"@@locale": "ar_SA",
"homePageAppBarTitle": "الصفحة الرئيسية",
"homePageMainFormTitle": "معلومات شخصية",
"formFieldName": "اسم",
"formFieldNameHint": "أدخل أسمك",
"formFieldEmail": "البريد الإلكتروني",
"formFieldEmailHint": "أدخل بريدك الإلكتروني",
"formFieldDOB": "تاريخ الولادة",
"formFieldRequired": "يتطلب حقلا",
"formFieldSubmitInfo": "إرسال المعلومات",
"aboutUsPageAppBarTitle": "معلومات عنا",
"settingsPageAppBarTitle": "إعدادات",
"formFieldChangeLanguage": "تغيير اللغة",
"formFieldAbout": "لوريم إيبسوم هو ببساطة نص شكلي يستخدم في صناعة الطباعة والتنضيد. كان Lorem Ipsum هو النص الوهمي القياسي في الصناعة منذ القرن الخامس عشر الميلادي."
}
intl_fr_FR.arb
{
"@@locale": "fr_FR",
"homePageAppBarTitle": "Page d'accueil",
"homePageMainFormTitle": "Informations personnelles",
"formFieldName": "Nom",
"formFieldNameHint": "Entrez votre nom",
"formFieldEmail": "Email",
"formFieldEmailHint": "Entrer votre Email",
"formFieldDOB": "Date de naissance",
"formFieldRequired": "Champs requis",
"formFieldSubmitInfo": "Soumettre des informations",
"aboutUsPageAppBarTitle": "À propos de nous",
"settingsPageAppBarTitle": "Réglages",
"formFieldChangeLanguage": "Changer de langue",
"formFieldAbout": "Lorem Ipsum est simplement un texte factice de l'industrie de l'impression et de la composition. Lorem Ipsum est le texte factice standard de l'industrie depuis les années 1500."
}
Step #8: Now, Generate Dart Message Files from ARB Files
Now we will set our messages to be ready to use. The intl package via a command generated Dart code files from ARB files as given below:
flutter pub run intl_translation:generate_from_arb lib/src/lang/l10n.dart lib/l10n/*.arb --output-dir=lib/intl
You will see four files generated in the lib directory.
- messages_all.dart
- messages_ar_SA.dart
- messages_en_US.dart
- messages_fr_FR.dart
Also, we already created ARB files, so we need not to worry about what these files will do. Basically, these files will load the localized messages, and looks like this:
import 'dart:async';
import 'package:intl/intl.dart';
import 'package:intl/message_lookup_by_library.dart';
import 'package:intl/src/intl_helpers.dart';
import 'messages_ar_SA.dart' as messages_ar_sa;
import 'messages_en_US.dart' as messages_en_us;
import 'messages_fr_FR.dart' as messages_fr_fr;
typedef Future<dynamic> LibraryLoader();
Map<String, LibraryLoader> _deferredLibraries = {
'ar_SA': () => new Future.value(null),
'en_US': () => new Future.value(null),
'fr_FR': () => new Future.value(null),
};
MessageLookupByLibrary _findExact(String localeName) {
switch (localeName) {
case 'ar_SA':
return messages_ar_sa.messages;
case 'en_US':
return messages_en_us.messages;
case 'fr_FR':
return messages_fr_fr.messages;
default:
return null;
}
}
/// User programs should call this before using [localeName] for messages.
Future<bool> initializeMessages(String localeName) async {
var availableLocale = Intl.verifiedLocale(
localeName,
(locale) => _deferredLibraries[locale] != null,
onFailure: (_) => null);
if (availableLocale == null) {
return new Future.value(false);
}
var lib = _deferredLibraries[availableLocale];
await (lib == null ? new Future.value(false) : lib());
initializeInternalMessageLookup(() => new CompositeMessageLookup());
messageLookup.addLocale(availableLocale, _findGeneratedMessagesFor);
return new Future.value(true);
}
bool _messagesExistFor(String locale) {
try {
return _findExact(locale) != null;
} catch (e) {
return false;
}
}
MessageLookupByLibrary _findGeneratedMessagesFor(String locale) {
var actualLocale = Intl.verifiedLocale(locale, _messagesExistFor,
onFailure: (_) => null);
if (actualLocale == null) return null;
return _findExact(actualLocale);
}
Step #9: Date and Time, Number, Bidirectional Text
We will see how all these elements will be displayed on the app. Also, since we will need content from package intl, it is better to add a dependency for that package and import it.
Add dependency
dependencies:
intl: ^0.16.0
Import package
import 'package:intl/intl.dart' as intl;
Default en_us locale does not require any modification in format of Date and time. You can simply use this:
print(new DateFormat.yMMMd().format(new DateTime.now()));
To format the date time for other locales, use this code:
Use initializeDateFormatting method
import 'package:intl/date_symbol_data_local.dart';
initializeDateFormatting("fr_FR", null).then((_) => runMyCode());
For numbers, use this code:
var f = NumberFormat('###.0#', 'en_US');
print(f.format(12.345));
For bidirectional text, use this code:
class _MyAppState extends State<MyApp> {
Locale _locale;
setLocale(Locale locale) {
setState(() Are
_locale = locale;
});
}
//rest of the code
Step #10: To Manage Interpolation and Plurals
String showUsersCount(int quantity) {
return Intl.plural(
quantity,
zero: 'You have no friends',
one: '$quantity friend',
other: '$quantity friends',
name: "friend",
args: [quantity],
examples: const {'quantity': 5},
desc: "Number of contacts",
);
}
Use this code to manage interpolations and Plurals. Then, all you need to do is pass your value in the defined showFriendsCount() method to get the output.
Step #11: To Format Text in ARB Files
Import the flutter_markdown plugin, use the Markdown widget to display text with inline styling.
Markdown(
shrinkWrap: true,
data: AppLocalizations.of(context)!.markDownDemo,
),
Provide inline styling in your ARB files:
"markdownDemo": "This line has a **bold** word"
Step #12: Do the Localization Using Translation Management System
It can be challenging to handle all translation files, also very tedious. Hence you can use a translation management system to manage all your Flutter internationalization needs while offering complete support for ARB files.
Such a management system will offer features like:
Easy integration with Asana and GitHub
Collective Translations
Quality tools for translation
Seamless management of translations using one dashboard
Conclusion
So, that’s how you do the Flutter localization and internationalization. We hope that will help you do so or help you hire developers around with the same knowledge. So, go ahead, and do it yourself now.
At your Team in India, we have a team of Flutter App Experts. If you want to hire Developers or have any questions on what all services we offer at Your team in India– Click here to contact us.


