Note: This blog was originally published on 21st June 2021 and updated on 20th March 2023.
Quick Summary: The blog explains how to create a video streaming app with Flutter, covering basics of Flutter and Dart, and providing step-by-step instructions for implementing features like video player, authentication, and search functionality. It also discusses tools and libraries for easier app development.
To play videos, the Flutter team provides a video_player plugin, which helps in playing the stored videos on your system (as an asset from the internet).
Video Player plugin by Flutter for iOS and Android are as follows:
iOS - AVPlayer
Android - ExoPlayer
The plugin offered by Flutter helps in streaming video from the internet with the essential pause and play buttons. Here are the steps that you can follow to add it to your Flutter app.
-
Add video_player dependency
Add the dependency to your pubspec.yaml.
dependencies:
flutter:
sdk: flutter
video_player:
-
Add permissions to the app
Update iOS and Android configurations for adding all necessary permissions to stream the videos from the internet.
For iOS
NSAppTransportSecurity
NSAllowsArbitraryLoads
For Android
-
Create and initalize a VideoPlayerController
VideoPlayerController allows you to connect different types of video content while controlling the playback. Initialize the controller to create a connection to the video and get the controller ready for playback.
How to create and initialize the VideoPlayerController?
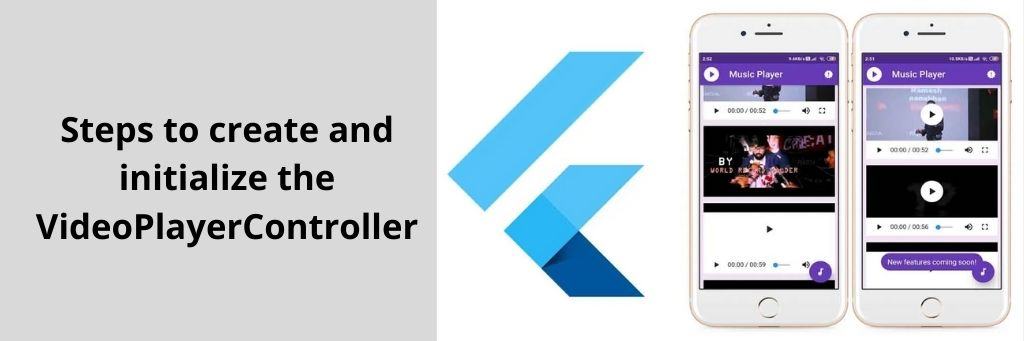
- Create StatefulWidget with State Class
- Add a variable to State class (to store VideoPlayerController)
- Add a variable to State class to store the Future received back from VideoPlayerController.initialize
- In initState, create and initialize the controller
- Use dispose method to dispose the controller
Here’s the code to do so:
class VideoPlayerScreen extends StatefulWidget { VideoPlayerScreen({Key? key}) : super(key: key);
@override
_VideoPlayerScreenState createState() => _VideoPlayerScreenState();
}
class _VideoPlayerScreenState extends State {
late VideoPlayerController _controller;
late Future _initializeVideoPlayerFuture;
@override
void initState() {
// Create an store the VideoPlayerController. The VideoPlayerController
// offers several different constructors to play videos from assets, files,
// or the internet.
_controller = VideoPlayerController.network(
'https://flutter.github.io/assets-for-api-docs/assets/videos/butterfly.mp4',
);_initializeVideoPlayerFuture = _controller.initialize();
super.initState();
}@override
void dispose() {
// Ensure disposing of the VideoPlayerController to free up resources.
_controller.dispose();
super.dispose();
}@override
Widget build(BuildContext context) {
// Complete the code in the next step.
return Container();
}
} -
Video Player Displays
VideoPlayer widget is now available to display the video initialized by VideoPlayerController. Now, wrap the VideoPlayer widget in the AspectRatio widget for setting the appropriate proportions of the video.
After the _initializeVideoPlayerFuture() is done, you must display the VideoPlayer widget. Now, use FutureBuilder to display the loading spinner.
// Use a FutureBuilder to display a loading spinner while waiting for the
// VideoPlayerController to finish initializing.
FutureBuilder(
future: _initializeVideoPlayerFuture,
builder: (context, snapshot) {
if (snapshot.connectionState == ConnectionState.done) {
// If the VideoPlayerController has finished initialization, use
// the data it provides to limit the aspect ratio of the video.
return AspectRatio(
aspectRatio: _controller.value.aspectRatio,
// Use the VideoPlayer widget to display the video.
child: VideoPlayer(_controller),
);
} else {
// If the VideoPlayerController is still initializing, show a
// loading spinner.
return Center(child: CircularProgressIndicator());
}
},
) -
Pause and Play the video
Use the play() and pause() method to play and pause the video. Adding a FloatingActionButton will help you do that.
Here’s the code to follow:
FloatingActionButton(
onPressed: () {
// Wrap the play or pause in a call to `setState`. This ensures the
// correct icon is shown.
setState(() {
// If the video is playing, pause it.
if (_controller.value.isPlaying) {
_controller.pause();
} else {
// If the video is paused, play it.
_controller.play();
}
});
},
// Display the correct icon depending on the state of the player.
child: Icon(
_controller.value.isPlaying ? Icons.pause : Icons.play_arrow,
),
)
At last, we really hope that by any chance this unique guide can help you to overcome hurdles to understand the video streaming process. At Your Team in India, we have a team of Flutter App Experts. If you want to hire Developers or have any questions on what all services we offer at Your team in India– Click here to contact us.

Frequently Asked Questions
Q. How do I use MUX for live streaming?
To use MUX for live streaming:
- Create an account and set up a live stream in the MUX dashboard.
- Use MUX's API or SDK to integrate the stream into your app or website.
- Push your video stream to the ingest URL using RTMP or HLS.
- Monitor the stream and view analytics in the dashboard.
Q. Which API is used in live streaming?
Some commonly used APIs for live streaming include WebRTC, RTMP, HLS, MPEG-DASH, and RTSP.
Q. How do you implement MUX in Flutter?
To implement MUX in Flutter, you can follow these general steps:
- Add the MUX SDK dependency to your Flutter project.
- Configure the MUX SDK by initializing it with your MUX API keys.
- Create a new live stream in the MUX dashboard.
- Start the live stream by pushing your video stream to the specified ingest URL using a supported streaming protocol such as RTMP or HLS.
- Use MUX's player API to integrate the live stream into your Flutter app.
Q. How do I make a video streaming app for Android?
To make a video streaming app for Android:
- Choose a development platform or framework like Java, Kotlin or Flutter.
- Define your app's features like user registration, video playback and social sharing.
- Choose a video streaming service or API like YouTube, Vimeo or AWS Elemental MediaLive.
- Integrate the video streaming service or API using their SDKs or APIs.
- Design the user interface using Android app development tools like Android Studio and XML.
- Test and debug your app.
- Publish your app on the Google Play Store or another app store.