Introduction
In the realm of Flutter app development, animations unfold in two distinct forms: drawing-based animations and code-based animations. These two categories encapsulate the dynamic visual elements that bring life to your user interface. Drawing-based animations encompass dynamic graphics, vectors, characters, or any element that transforms animation. In contrast, code-based animations revolve around manipulating widget layouts and styles, which include tasks like animating lists, colors, and text.
While both types contribute to the engaging user experience, this article will primarily delve into the intricacies of code-based animations, shedding light on how to harness Flutter's innate potential to craft captivating animations without relying on third-party frameworks.

Types of Code-Based Animations in Flutter
There are two main types of code-based animations in Flutter: Implicit and Explicit animations. In both cases, you can either make use of built-in widgets or custom widgets. Let's explore each type further with a few examples.
1. Implicit Animation
Implicit animations in Flutter are your go-to tools when you want to create smooth and automatic transitions between different states of your UI elements. They simplify the animation process by handling the changes for you, making your app's interface more engaging without requiring extensive code.
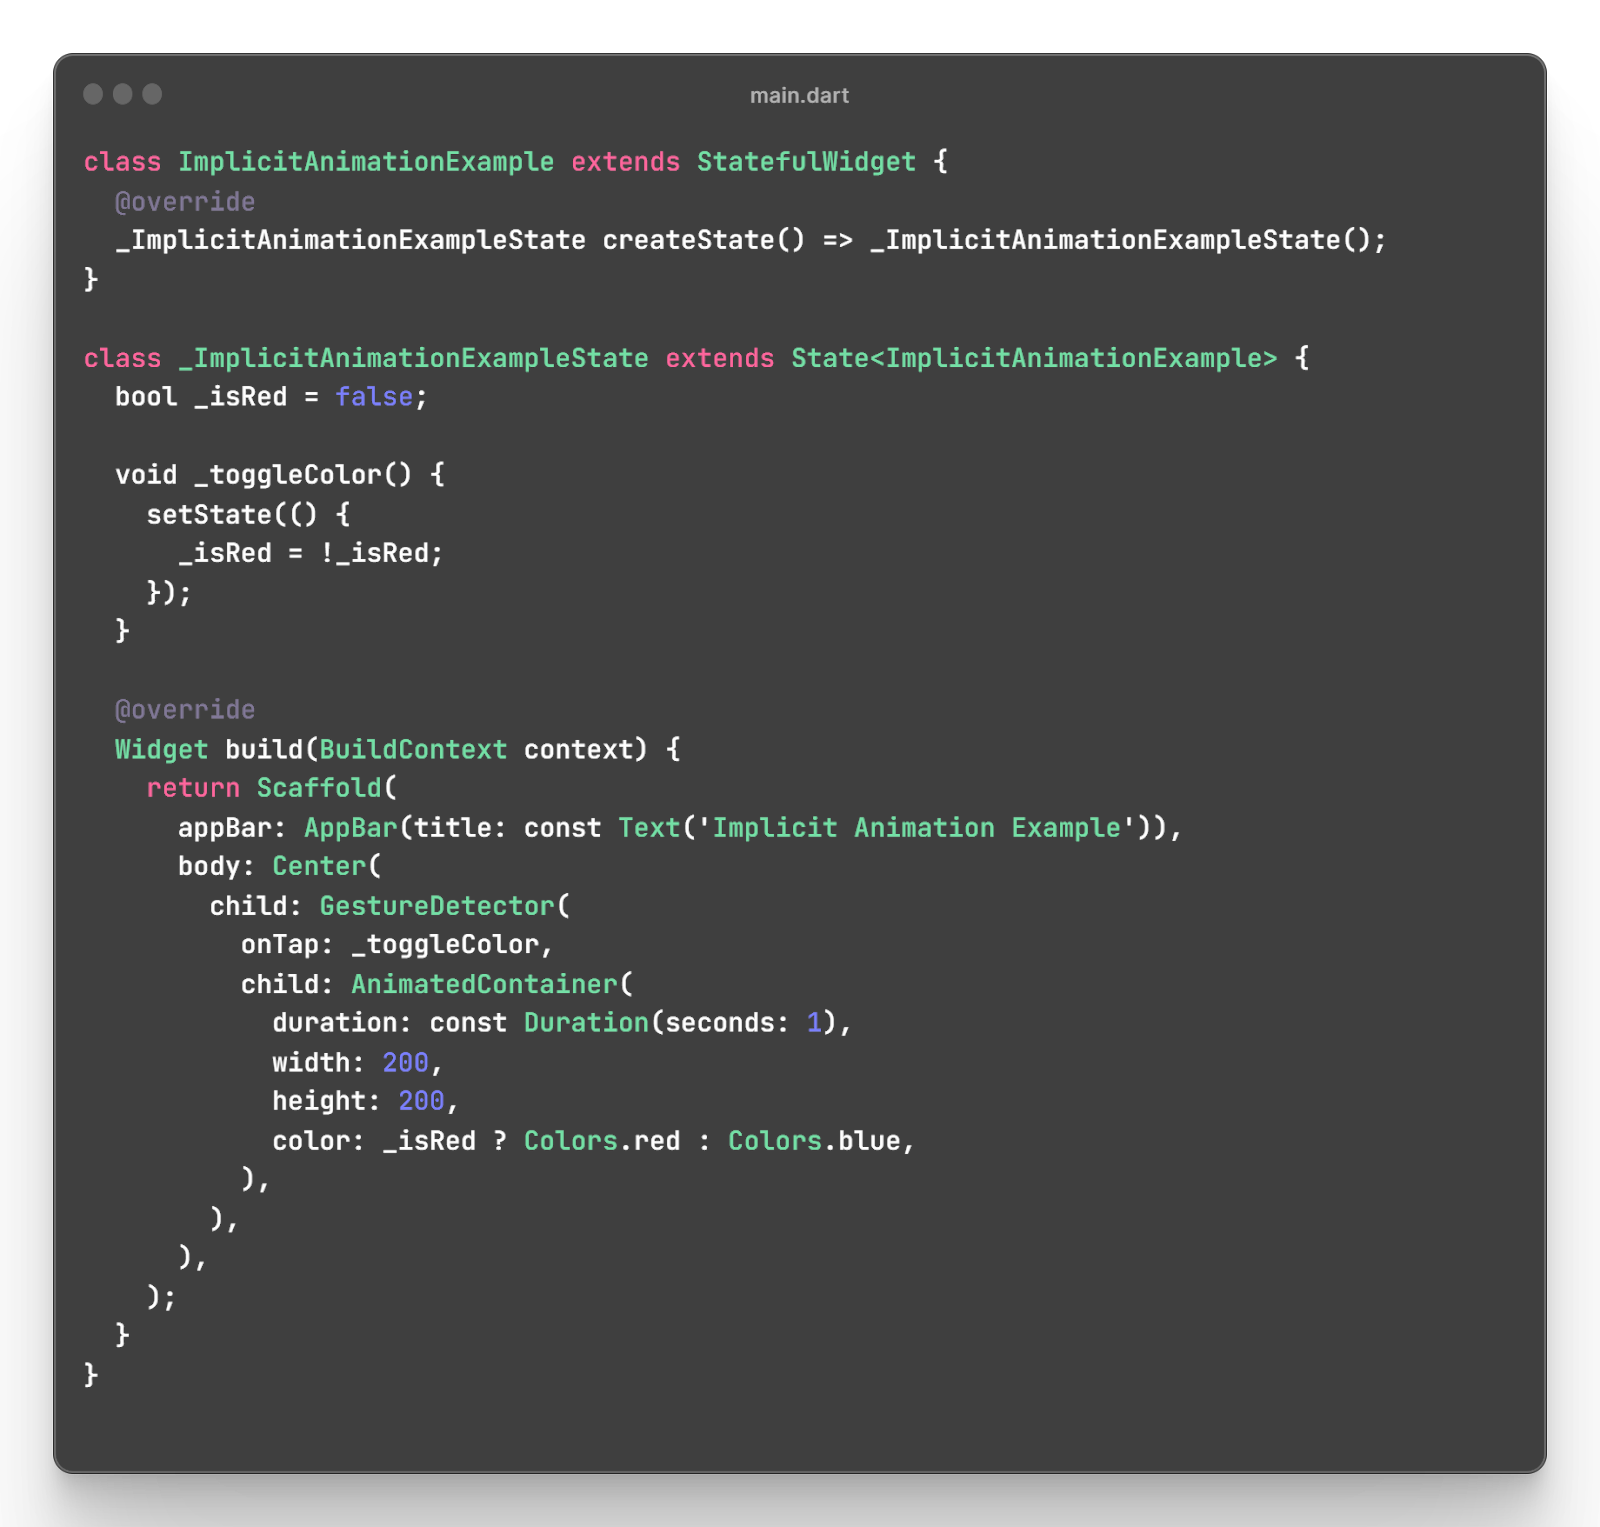
In this example, when you tap the container, the color smoothly transitions from blue to red, thanks to the implicit animation provided by the AnimatedContainer widget.

They are also called AnimatedFoo widgets, where Foo is the animated property. Most of them are animated versions of the widgets you already know and use, like
Container/AnimatedContainer, Padding/AnimatedPadding,
Positioned/AnimatedPositioned, …etc
Here are some more AnimatedFoo Widgets:
- AnimatedAlign
- AnimatedContainer
- AnimatedDefaultTextStyle
- AnimatedOpacity
- AnimatedPadding
- AnimatedPhysicalModel
- AnimatedPositioned
- AnimatedPositionDirectional
- AnimatedSize
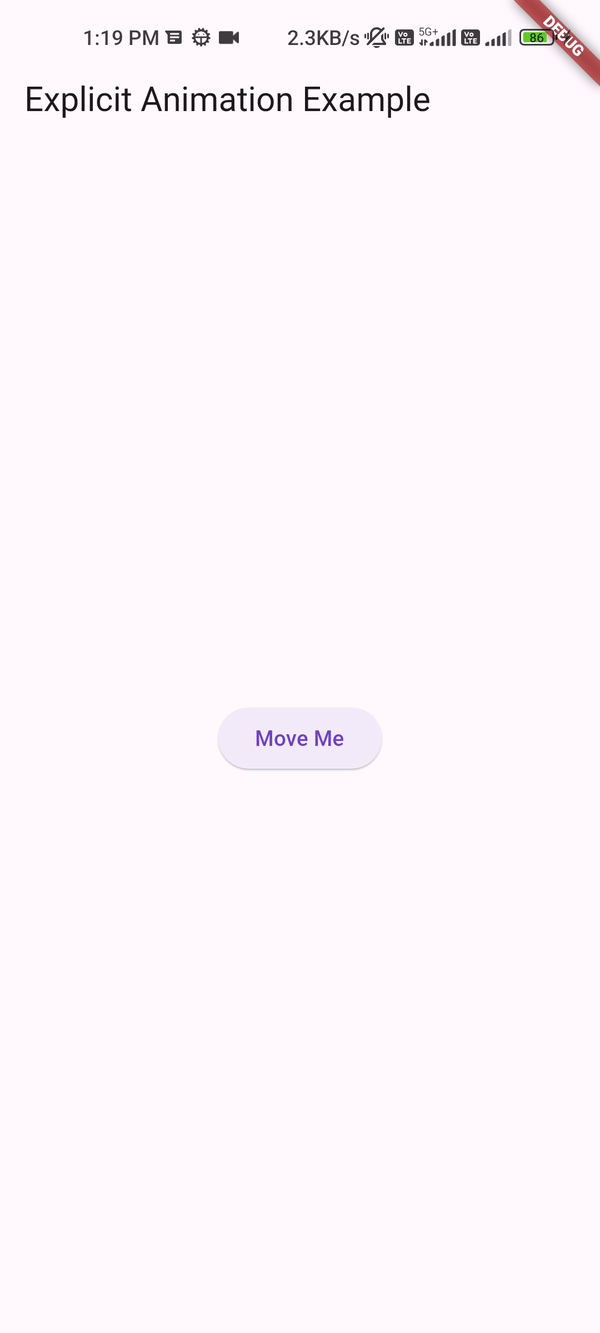
2. Explicit Animations
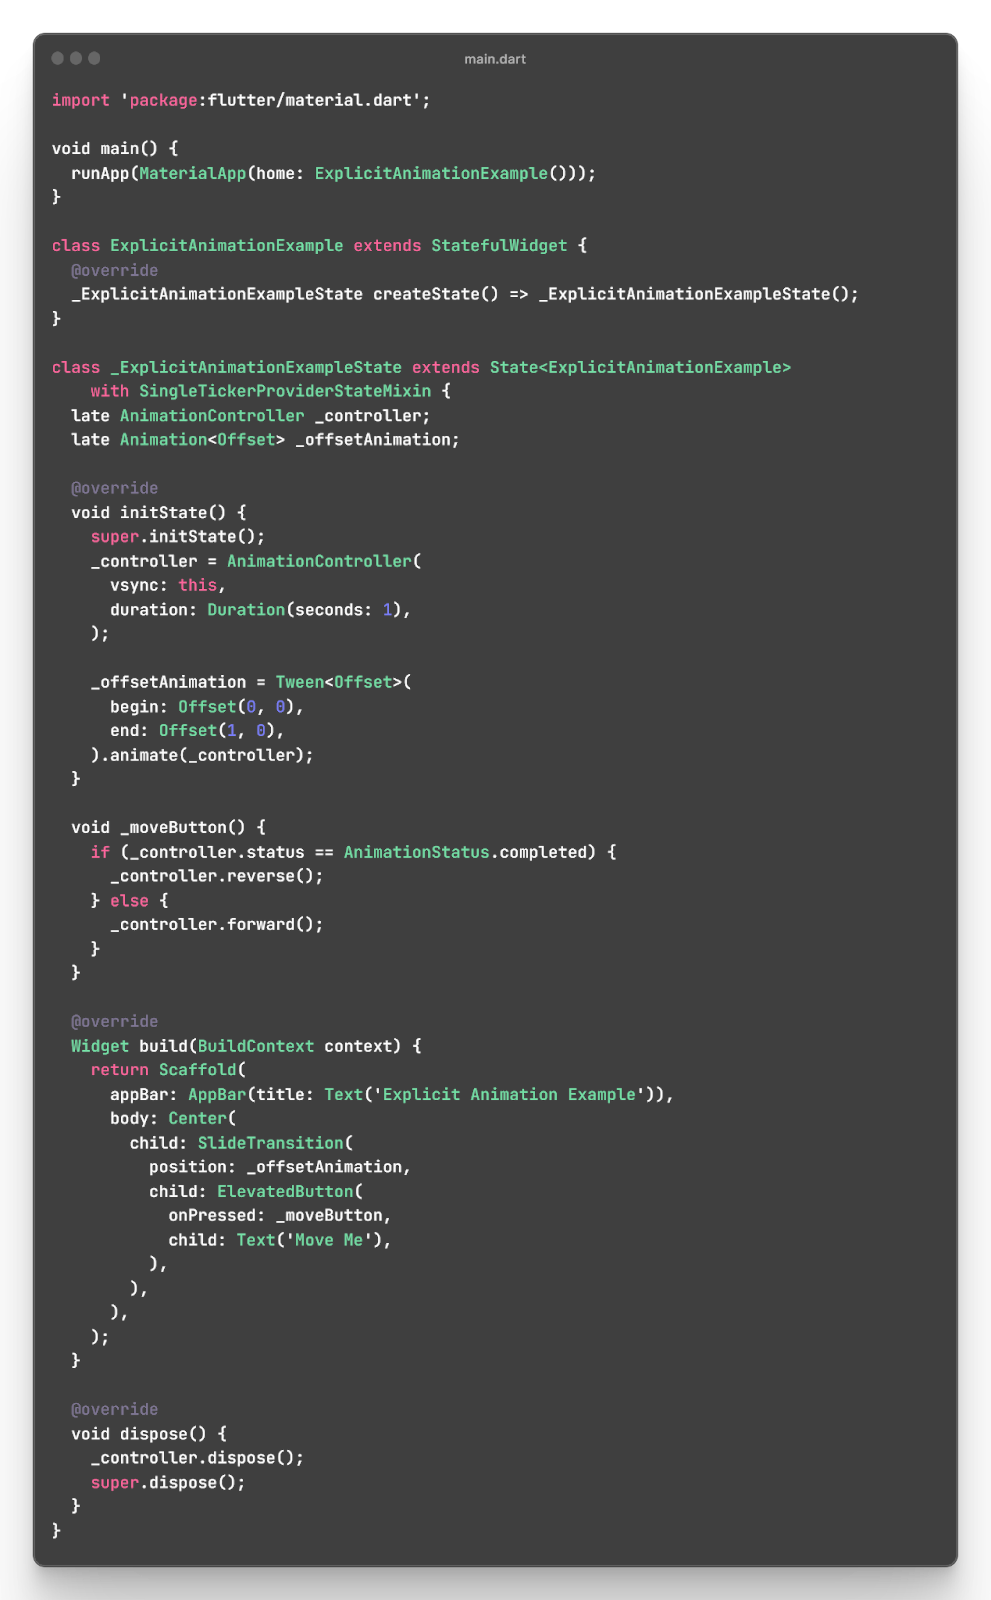
Explicit animations in Flutter are a powerful toolset that allows you to exercise granular control over the animation process. Unlike implicit animations that automate transitions, explicit animations put you in the driver's seat, letting you orchestrate animations step by step. This level of control is particularly useful when you need intricate animations that respond to user interactions or follow a specific timeline
How it works :
At the heart of explicit animations lie animation controllers and tweens. An animation controller manages the timing and state of an animation. It determines the animation's duration, curve, and plays a pivotal role in triggering the animation. Tweens, short for "in-betweens," define the animation's range by specifying the starting and ending values of a property.
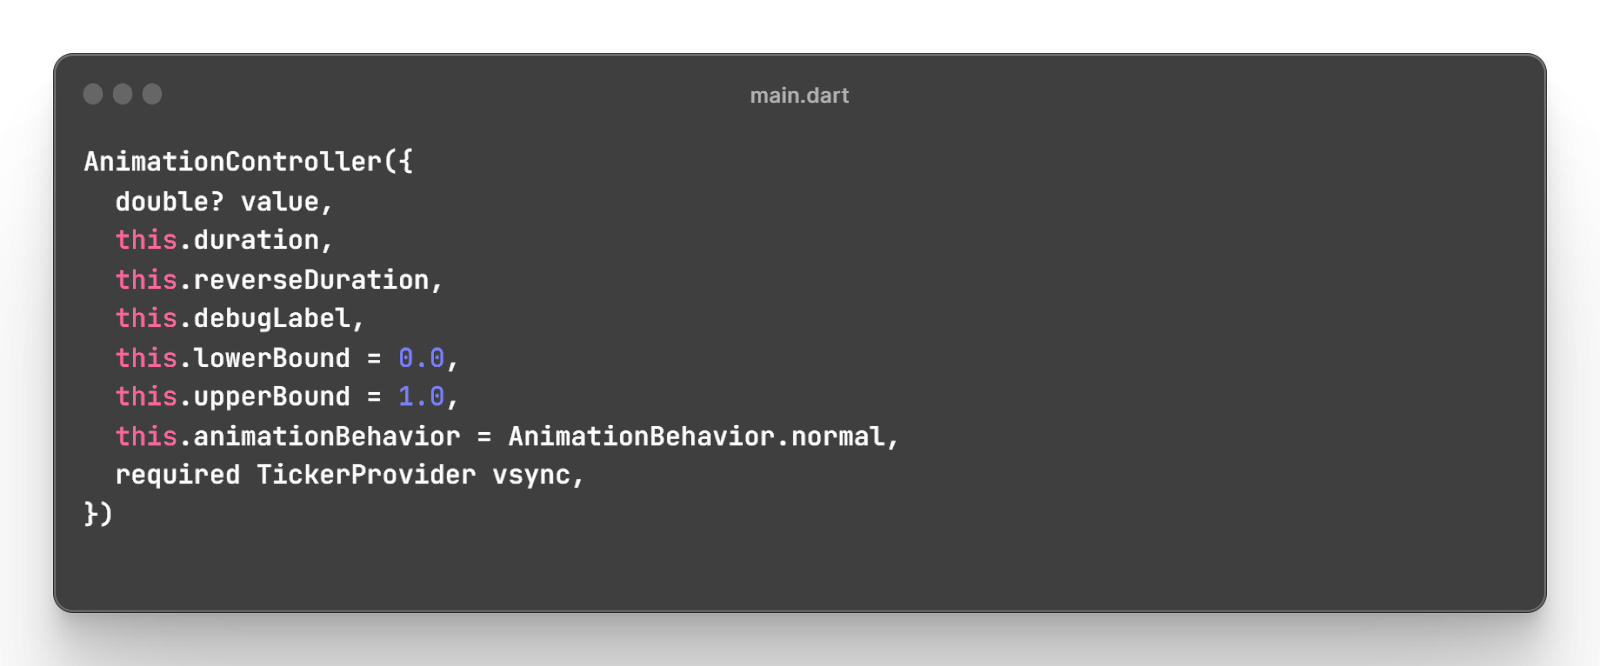
The animation controller
The AnimationController allows you to “control” the animation. To do that, it needs a vsync value of type TickerProvider. A Ticker basically keeps track of Flutter’s frames rendering and allows the controller to follow that ticker and “animate” through it within the specified duration, while linearly producing values between the lowerBound and the upperBound values which are by default 0 & 1.
Explicit Animations With Built-in Widgets
They’re called FooTransition widgets, where Foo is the animated property of the widget
- AlignTransition
- PositionedTransition
- AlignTransition
- DecoratedBoxTransition
- DefaultTextStyleTransition
- FadeTransition
- PositionedTransition
- RelativePositionedTransition
- RotationTransition
- ScaleTransition
- ScaleTransition
- SizeTransition
- SlideTransition
- StatusTransitionWidget
There is no RadialGradientTransition widget, right? So how did we achieve it? With the AnimatedBuilder widget! Here’s the code:

You can create your own animation and connect with controller and pass it to AnimatedBuilder
Animation=Tween<double>(begin:0,end:0.5).animate(CurvedAnimation(parent: controller, curve: Curves.easeInBack));
AnimatedBuilder(
animation: animation,
builder: (context,child){
return Container(
height: 300,
width: 300,
decoration: BoxDecoration(
gradient: RadialGradient(
colors: const [Colors.green, Colors.white, Colors.orange],
stops: [0, controller.value, 1],
),
borderRadius: BorderRadius.circular(150),
border: Border.all(color: Colors.white)
),
);
},
),
Conclusion
In conclusion, mastering advanced Flutter animations empowers developers to elevate their app interfaces to new heights. By delving into the intricacies of Flutter's animation capabilities, developers can craft seamless, engaging, and visually stunning user experiences. With this guide as your companion, you're well-equipped to navigate the complexities and unleash the full potential of Flutter animations, adding a dynamic touch to your app development journey. Happy coding!
Ready to elevate your Flutter app design? Unlock the full potential of Flutter layouts with our professional Flutter developers.