Quick Summary:
Building a CMS with Node.js technology stack is a great way to improve website functionality and user experience. In this article, we provide a comprehensive guide on how to build a CMS with Node.js. From defining the project requirements to deploying the final product, we cover all the important steps involved in the process. Whether you're a seasoned developer or just starting out, this article will help you create a robust and efficient CMS with Node.js.
A high-end CMS results from technology that backs it up to stay upright in any situation and condition. And, Node.js has been truly standing still to create some robust CMS’ that truly fulfills the purpose of establishment.
In this post, every Node.js developer, or maybe the managers or Software Development Companies who are planning to hire node js developer team, will get an insight into why Node.js is perfect to build CMS, How to use Node.js for CMS building, and what are the popular Node.js CMS that is build using Node.js up and running effectively nationwide.
Source
Why Should You Prefer Node.js To Build CMS?
There are several good reasons why you should prefer Nodejs development to build CMS, which are as follows:
- Node.js is an open-source server environment.
- It is free.
- Node.js uses JavaScript (JS) on the server.
- It runs on almost every platform, including Linux, Windows, Unix, and Mac OS X.
Steps to Build CMS using Nodejs
(In this guide on how to build cms, we will be showing you how to use Node.js and MongoDB as your database to create your Node.js CMS).
Also, the CMS you will prepare using this guide will have a homepage consisting of four links, including:
✅ About us
✅ Login functionality
✅ User registration functionality
✅ Validation Place
Also, once the user is logged in, the tabs will certainly change, and you’ll see:
- Admin
- Username
- Logout Button
The login and registration button will disappear once a user signs in. And, once you are signed in, you can add posts, images, media, or modify it as per your preferences. Besides, you can even administer which comments you wish to show on the posts. Once you are done using the CMS, you can log out, and the homepage will be shown with the tabs shown in the above section.
Step 1: Creating Project Directory Structure
The first step is to create the new project and the project directory structure. For that, you will need an IDE of your choice (considering WebStorm here, which already incorporates Node.js Express app generator). However, in this post, we will be doing it from scratch.
Using an empty project structure with the name of your choice and let it load. You will see a blank black folder once the loading is done. Now, you will have to create specific directories here like models, configuration, public folder, CSS, JS, controllers, default view, and so on.
Step 2: Installing Express, Mongoose, NPM, and nodemon
Make sure to have Node.js installed (latest version) along with MongoDB (your database), and NPM before moving ahead. At this point, you need to have your package.json ready. Once every essential is installed, you will see a key ‘dependencies’ in your package.json, which has entered Express as a production dependent.
Step 3: Build a Server with Express
To create the app, create a constant ‘app’ Now, type ‘app.listen’ to create your server and start it. After that, add ‘port number’ (let’s say 3000). Then, create your first route, and pass it a function with the response and request object so that anyone who tries to access the localhost must get a response, like ‘Welcome to the CMS’ instead of showing an error.
Now, configure your database to connect Mongoose to MongoDB using the Mongoose variable and connect method, which expects a string to the database. Remember, you can’t use HTTP protocol in MongoDB, as it uses its protocol, MongoDB. Now, add the server name and the port ‘27017’, which is the default port on which MongoDB runs locally. Now, put a database name. The connect method returns a promise, for which you need to type ‘console.log MongoDB connected successfully.’
Step 4: Set Up View Engine with Handlebars
The view engine helps display HTML pages or render them to the end user. For this, you will need to install express handlebars and, along with it, set up your view engine using:
app.engine('handlebars', exphbs());
app.set('view engine', 'handlebars');
Following both these commands, you can get ready your view engine and configure it to use. You’ll be seeing a mustache sign if you have done it correctly. Now, add the layout of your choice that you want to use in your CMS. You can simply use a bootstrap template found on the bootstrap website. Now render everything using res.render('index');
Step 5: Create Partials and Routes Using Controllers
Create the file named JavaScript Default Routes and add all the default routes responsible for the front-end page. Then, using Express, create a router object to create different routes. You will need two routes, i.e., default routes and admin routes. Once done, export the router for the app to know about it (or otherwise, the app will crash). Next, create a new model and then import Mongoose, where the model will be a blueprint for our database and post.
So, first import mongoose, create a variable called schema, define your post schema, create a new object, new schema, and inside curly braces, define all your requirements for the post. You will also set the status here, i.e., either public, private, or draft. The space for description will be added in this step besides adding dates in the posts.
Step 6: Creating Routes and Admin Area
After completing the post model, export it module.exports. Now use the module function mongoose.model(, and then close the post model.
-
Creating Routes
Now, create the login route, which will have a router (get method) that resides inside the default controller.login. Now go to the default controller and create a new method, ‘login’ and request a response object. Finally, put the logic for the login route, save it, and refresh the browser to check whether the login tab has appeared or not.
To add text to this page, create a new handlebar file (login.handlebars). You will now get the template for the login form, which has a card, header, card body, classes (automatically updated from Bootstrap), IDs, types, submit button, and so on. Now, render this page render, and you will be displayed a clean login page on the browser.
Now add a post method so that the user can log in using their email address and password. Finally, add aCreating Routes message that the users will be shown once they submit the details.
Similarly, you will have to add a ‘register route.’ -
Admin Area
Create a new admin file, and copy the HTML. Next, go to the admin folder and open index.html, copy everything, and jQuery and CSS files, and paste it into the public directory. Next, you will have to create a default route, which will give you an admin controller. Copy the code from the default route index file and paste it into the admin controller. Next, create an object and use admin index res.render (admin/index) for which you will have to create a new handlebar file inside the admin folder.
Step 7: Admin Partials and New Post Section
Create admin headers, admin footer, site nav, and change the components to ‘posts.’ Now add a post route in the admin routes. After that, create ‘create posts route’ and go to the browser to check if it is displayed there. Lastly, create a form in the admin area to hold the ‘create post’ form. Now, render it all, and you will see the ‘create post’ form on the browser.
Read our other post Why your company needs Node.js Developers?
Step 8: Register and Authenticate the User
In this step, you will fetch the first name attributes from the registration form, which has all the attributes, including first name, last name, and email. Now, make all these attributes mandatory besides showing an error message if the passwords don’t match. You will also need to add a message here that tells the users if they are successfully registered or not.
--:Registration of Users:--
const Joi = require('joi');
Joi.objectId = require('joi-objectid')(Joi);
const mongoose = require('mongoose');
const users = require('./routes/users');
const express = require('express');
const app = express();mongoose.connect('mongodb://localhost/mongo-games')
.then(() => console.log('Now connected to MongoDB!'))
.catch(err => console.error('Something went wrong', err));app.use(express.json());
app.use('/api/users', users);const port = process.env.PORT || 4000;
app.listen(port, () => console.log(`Listening on port ${port}...`));
--:Authentication of Users:--
/routes/auth.js
const Joi = require('joi');
const bcrypt = require('bcrypt');
const _ = require('lodash');
const { User } = require('../models/user');
const express = require('express');
const router = express.Router();router.post('/', async (req, res) => {
});
module.exports = router;
Go to the index.js file and set up the route for ‘api/auth’
const Joi = require('joi');
Joi.objectId = require('joi-objectid')(Joi);
const mongoose = require('mongoose');
const users = require('./routes/users');
const auth = require('./routes/auth');
const express = require('express');
const app = express();mongoose.connect('mongodb://localhost/mongo-games')
.then(() => console.log('Now connected to MongoDB!'))
.catch(err => console.error('Something went wrong', err));app.use(express.json());
app.use('/api/users', users);
app.use('/api/auth', auth);const port = process.env.PORT || 4000;
app.listen(port, () => console.log(`Listening on port ${port}...`));
Back to the auth.js file, where we need to set up the logic to authenticate users. Validate the HTTP request being sent, find the user in the database, bcrypt the stored password against provided. Use this code to get it done:
/routes/auth.js
const Joi = require('joi');
const bcrypt = require('bcrypt');
const _ = require('lodash');
const { User } = require('../models/user');
const express = require('express');
const router = express.Router();router.post('/', async (req, res) => {
// First Validate The HTTP Request
const { error } = validate(req.body);
if (error) {
return res.status(400).send(error.details[0].message);
}
// Now find the user by their email address
let user = await User.findOne({ email: req.body.email });
if (!user) {
return res.status(400).send('Incorrect email or password.');
}
// Then validate the Credentials in MongoDB match
// those provided in the request
const validPassword = await bcrypt.compare(req.body.password, user.password);
if (!validPassword) {
return res.status(400).send('Incorrect email or password.');
}res.send(true);
});function validate(req) {
const schema = {
email: Joi.string().min(5).max(255).required().email(),
password: Joi.string().min(5).max(255).required()
};return Joi.validate(req, schema);
}module.exports = router;
List of Popular CMS built with Node.js
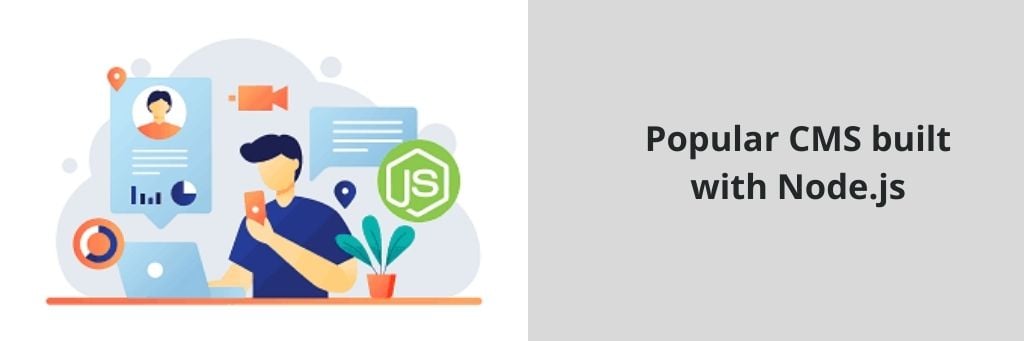
Some of the most popular CMS that is built using Node.js are efficiently working and are as follows:
- Ghost
- Strapi
- Reaction
- Node Beats
- Relax
- Calipso
- Factor
- Cody Hashbrown
- Total.js
- KeyStone.js
- Apostrophe CMS
In The Nutshell
Node.js is a simple path to creating some innovative CMS just like Ghost or Strapi for your business. The best part is that this tech stack is absolutely free and open-source, saving you a lot of time and cost. Hence, all Node.js developers, project managers, or newbie developers must consider Node.js to build CMS which is more creative, innovative, and highly reliable in the future.
At Your Team In India, we have a pool of certified Node.js engineers. Consider hiring a team of developers across different time zones to facilitate round-the-clock progress and ensure that development work is being carried out continuously without any significant downtime. This approach can also help in accommodating urgent requests and issues that may arise during different times of the day.
Frequently Asked Questions (FAQs)
Can you build a CMS with node JS?
Is NodeJS good for CMS?
Can I build a whole website using node JS?
What CMS uses node JS?
1. Ghost
2. Strapi
3. Reaction
4. Node Beats
5. Relax