Introduction
Power Apps, Microsoft's versatile platform for building custom business applications, empowers users to create robust solutions with minimal coding. One of the key features that enhances the flexibility and functionality of Parse JSON power automate function. In this article, we will delve into the ParseJSON power automate function and explore how it can be utilized within a Power Apps flow to generate collections efficiently.
Understanding ParseJSON
ParseJSON is a powerful function within Power Apps that allows users to convert a JSON string into a collection, providing a structured and accessible format for data manipulation. This function is particularly useful when working with data from external sources, such as web services or APIs, where information is often transmitted in JSON format.
Power Apps new ParseJson function can turn a text string into a record or table. It is especially useful when an app is used to trigger a Power Automate flow and returns a value to the app. Power Automate only allows returning a text string with the Respond To Power Apps (V2)action. But with the ParseJSON function, we can easily convert that text string to another data type. In this article, I will show you how to return a collection from a flow to Power Apps using ParseJSON.
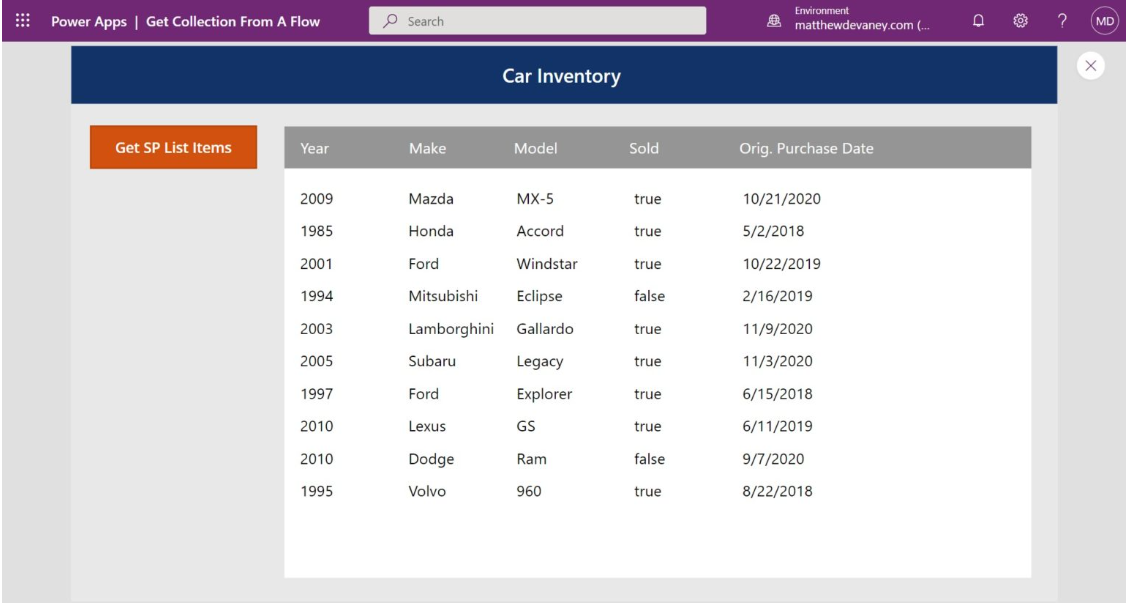
Introduction: The Car Sales Inventory App
The Car Sales Inventory app is used by salespeople at a car dealership to create a report on all the cars currently in stock. They open the app to the inventory screen and click on a button to show all cars in a SharePoint list.
Setup The SharePoint List:
Create a new SharePoint list called Car Inventory with the following columns:
- Year (number)
- Make (single-line text)
- Model (single-line text)
- PurchaseDate (date only)
- Sold (yes/no
Load this sample data into the SharePoint list:

Create A Flow In Power Automate:
Open PowerApps Studio and create a new blank canvas app. Insert a rectangle shape at the top of the app to make a header. Place a label on top of the rectangle to show the app’s title.
Browse to the Power Automate tab on the left navigation menu. Then select Create new flow.
On the Create your flow menu choose + Create from blank.
Name the flow Get Car Inventory SP List Items.
Send The Flow Result To Power Apps:
Next we will retrieve items from the Car Inventory SharePoint list in Power Automate and send the result back to Power Apps. Add the SharePoint – Get Items action to the flow as shown below
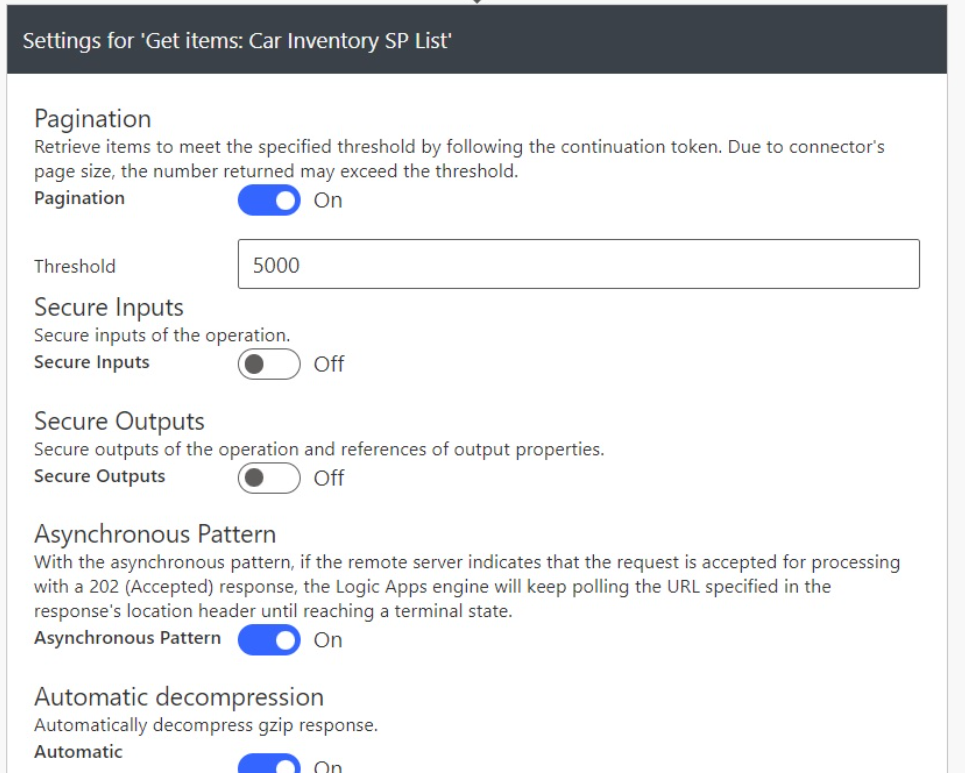
The SharePoint Get Items action only returns up to 100 records by default. To increase the limit go to the action’s settings menu, turn on pagination, and write a number in the threshold field. The maximum value is 5000.


Determine The Flow Output JSON Schema:
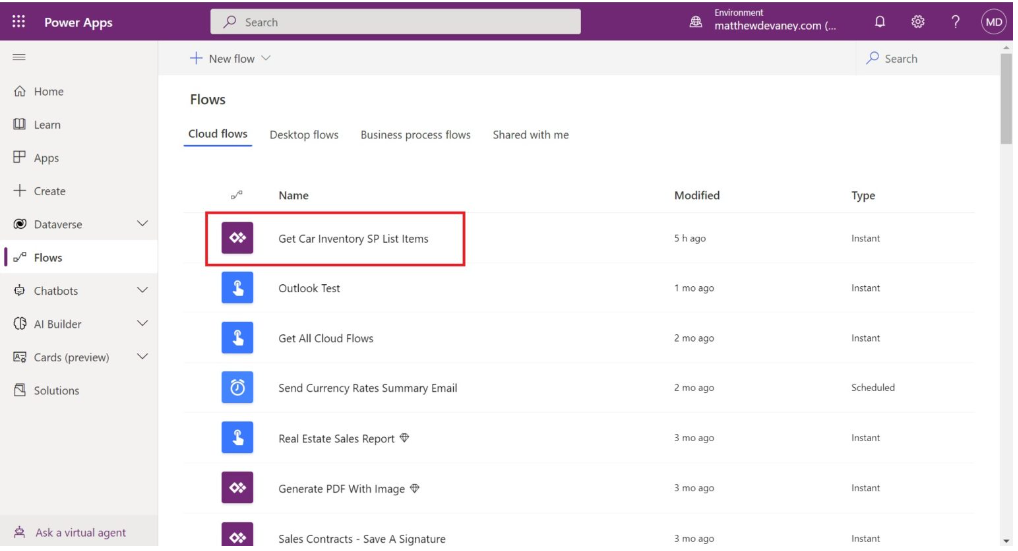
To use the ParseJSON function in Power Apps we must determine the JSON schema output by the flow. The best way to do this is by running a test of the flow and inspecting the final flow action. Go to the maker portal, browse to the flows tab and open the Get Car Inventory SP List Items flow.
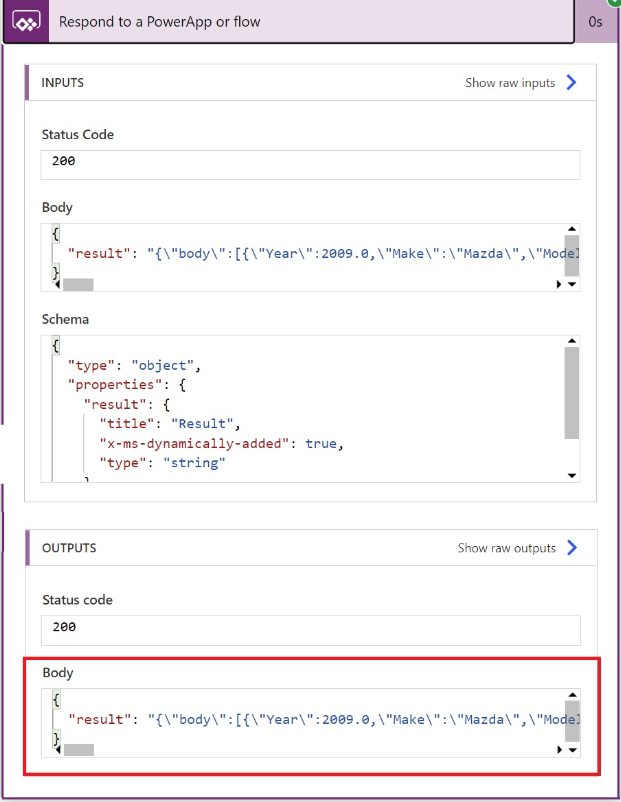
After the flow test is finished, look at the outputs of the Respond to a PowerApp or flow action. The body property contains the JSON schema. Notice that the SharePoint items are contained inside the body property of a JSON object. This information will come in handy soon when using the ParseJSON function in Power Apps.
Use The ParseJSON Function To Create A Collection:
When a button is pressed in Power Apps we want to load the flow output into a collection. Insert a new button and place it on the screen.
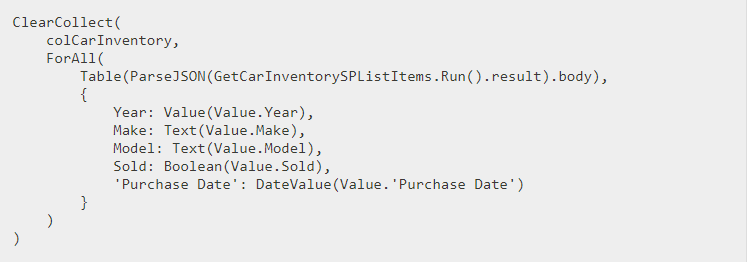
Use this code in the OnSelect property of the button. It runs the Power Automate flow and converts its output in the result property (text data type) into an untyped object using ParseJSON. Then it uses ForAll to loop over the untyped object and define each column’s data type using the Value function, Text function, Boolean function and DateValue function.These functions are known as type constructors.

Also, notice that we used the body property of the ParseJSON function result. This is why we needed to determine the flow output’s JSON schema in a prior step.
Display The Collection In A Gallery:
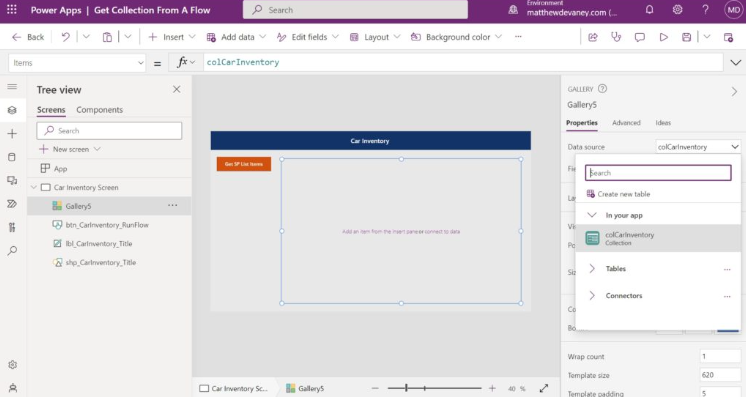
We’re almost done. The last step is to display the collection in a gallery. Add a new gallery to the screen and use the collection colCarInventory as the data source.
Insert 5 labels into the gallery: 1 label for each column in colCarInventory.
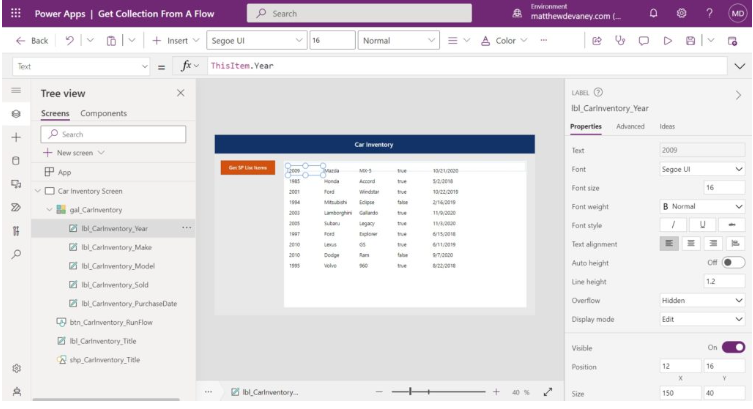
Then write this code block in each label to display the field’s value in the gallery.
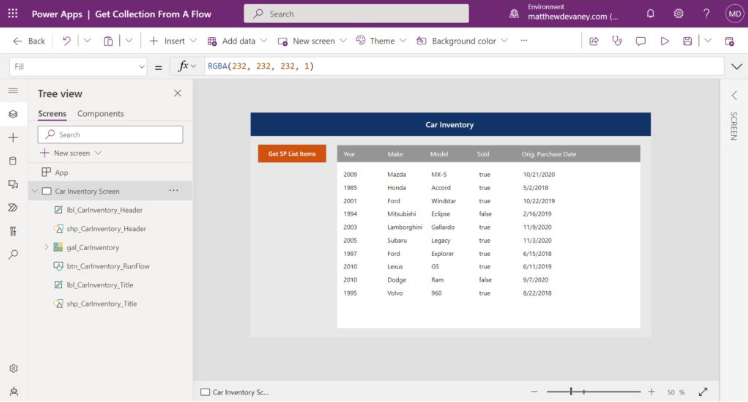
Finally, create one additional label and place it on top of the gallery. Write the matching column names into the label. The app is now finished.

Conclusion
In today's digital era, businesses are constantly seeking ways to automate processes and enhance productivity. Microsoft Power Apps and Power Automate (formerly known as Flow) are powerful tools that enable organizations to create custom applications and automate workflows without the need for extensive coding. One of the essential functions in PowerApps is the ParseJSON function, which allows you to retrieve and manipulate data from JSON (JavaScript Object Notation) responses generated by a Flow.
Hire our skilled Power Automate developers to automate workflows, boost efficiency, and unlock the full potential of your organization. Let's transform your operations together!