Introduction
As a Robotic Process Automation (RPA) developer, unlocking the synergy between Power Automate Desktop and external databases like MySQL presents a tremendous opportunity to elevate automation workflows. In this extensive guide, we will explore a sophisticated approach involving the utilization of .dsn files generated through the Microsoft ODBC Connector.
This strategic choice not only streamlines the connection setup process but also guarantees a secure and efficient workflow, establishing a robust foundation for data-driven automation. By following this guide, you'll harness the full potential of integrating Power Automate Desktop with MySQL databases, paving the way for enhanced productivity and seamless data interactions within your automated processes.
Prerequisites for Integration
Before diving into the integration process, it's imperative to confirm that all prerequisites are met:
MySQL Database Access
Before proceeding, confirm that you have permission to access a MySQL database. Gather essential connection details such as the server address, database name, and login credentials. These details are instrumental for a successful integration process with Power Automate Desktop, ensuring that the connection is established accurately and securely.
Microsoft ODBC Connector
Initiate the integration process by downloading and installing the Microsoft ODBC Connector for MySQL from the official source, which can be accessed at Microsoft ODBC Connector for MySQL. This connector acts as the vital bridge, establishing a seamless connection between Power Automate Desktop and the MySQL database. Ensure a smooth and secure integration by obtaining the connector from the official Microsoft source.
Setting Up ODBC
Now, let's walk through the process of configuring ODBC and creating a .dsn file for seamless integration:
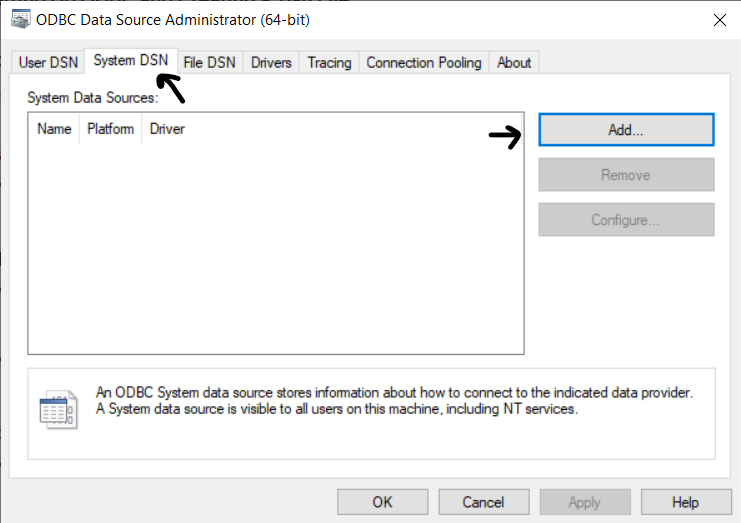
Launch ODBC Data Source Administrator:
- Open the ODBC Data Source Administrator on your machine. This tool acts as the gateway for configuring ODBC connections.
Navigate to System DSN and Add MySQL ODBC Driver:
- Access the "System DSN" tab within the ODBC Data Source Administrator and initiate the addition of a new Data Source Name (DSN).
- Click on the “Add” button.
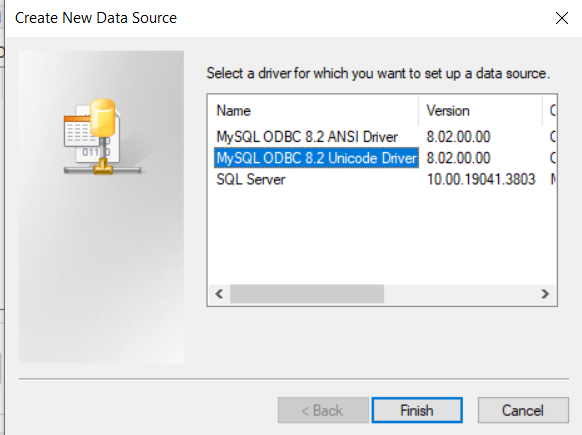
- Select the MySQL ODBC Unicode driver from the list of available drivers. This establishes the link between ODBC and MySQL.
Configure MySQL Connection Details:
As you add a new System Data Source, populate the configuration settings with the pertinent details of your MySQL database. This includes:
- Data Source Name (DSN): Provide a name that identifies your connection.
- Description (optional): Enter a brief description if desired.
- TCP/IP Server: Specify the address of your MySQL server.
- Port: Set the port number for the MySQL server (default is often 3306).
- Database: Enter the name of the target database.
- User and Password: Provide the login credentials for authentication.

Ensuring accurate input of these MySQL database details is crucial as it establishes the foundation for a secure and efficient ODBC connection. This information allows Power Automate Desktop to connect seamlessly with your MySQL environment.
Save Configuration as .dsn File:
- Save the configured settings as a .dsn file. This file encapsulates the connection details and simplifies the integration process with Power Automate Desktop. Note the location where the .dsn file is stored for future reference.
Test Connection Inside the Connector:
- Utilize the "Test" button within the ODBC Data Source Administrator to verify the successful connection to the MySQL database. This step ensures that the ODBC setup is robust and ready for integration.
Connecting Power Automate Desktop with MySQL Using .dsn File
With the .dsn file prepared, let's proceed to integrate it seamlessly with Power Automate Desktop:
Launch Power Automate Desktop:
Launch Power Automate Desktop to access its visual and user-friendly interface for designing automation workflows. Depending on your system, you can typically open Power Automate Desktop through the Start menu or by searching for it on your computer. Once opened, you'll be ready to begin creating and configuring automation processes using its powerful features.Create a New Flow:
Initiate the creation of a new flow within Power Automate Desktop. This is the canvas where you'll design the automation process.
Add MySQL Connector with .dsn File:
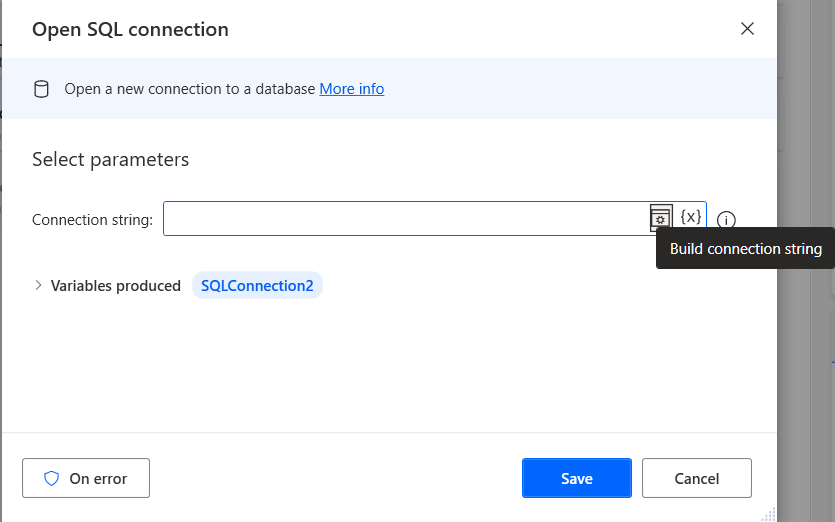
- Drop “Open SQL connection” action to the canvas.
- Click on the icon i.e “Build Connection String”.
- Now you see Data link properties and inside the first tab i.e. provider you have to select “Microsoft OLE DB Provider for ODBC Driver” and click on “next”.
- Inside the connection tab choose “Use connection string” and click on “build”.
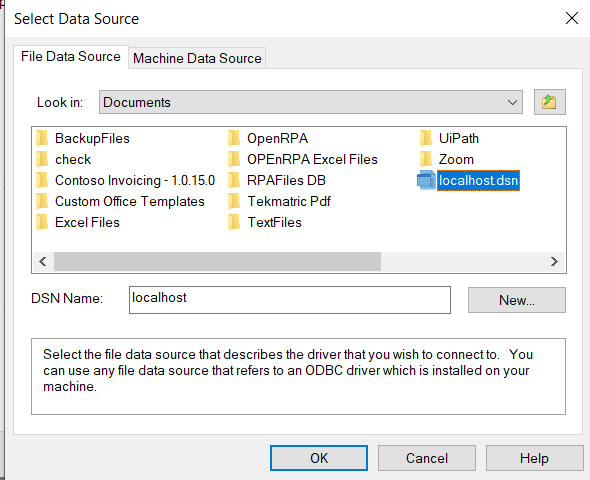
- Now you have to select the “.dsn” that you have created and click on the “ok” button.
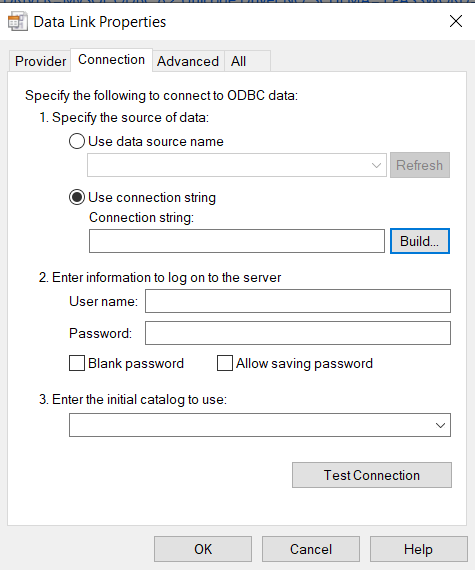

We made a successful connection now our flow is ready to do action related to the database.
Define Actions:
With the MySQL connector in place, articulate the specific actions you wish to perform within your automation workflow. This could involve querying data, updating records, or inserting new information into the MySQL database, depending on your automation requirements.Test the Flow:
Execute a comprehensive test to ensure the .dsn file integration works seamlessly. Validate that the connection is established correctly and the defined actions within your workflow yield the expected results. This step is crucial for identifying and addressing any potential issues early in the development process.Optimize and Refine:
Take advantage of Power Automate Desktop's iterative design capabilities to review your workflow for opportunities to optimize and enhance its efficiency. Iterative refinement ensures that your automation process is tailored to perfection, adapting to your organization's dynamic needs.Conclusion
In conclusion, the integration of a MySQL database with Power Automate Desktop using .dsn files represents a strategic advancement for RPA developers. This method not only simplifies the integration process but also adds a layer of security and adaptability to automation initiatives. By following the outlined steps, you can seamlessly integrate MySQL data into your workflows, unlocking new possibilities for efficiency and productivity.
Embrace the power of Power Automate Desktop and .dsn file integration to create automation workflows that are not only efficient but also secure and adaptive. Elevate your automation game and impress with the sophistication of your RPA solutions, establishing a foundation for data-driven success in your automation endeavors.
Hire Power Automate developers to automate workflows, boost efficiency, and unlock your organization's full potential. Let's transform your operations together!